
Chaotica: Transform Chains
Author's Note: I'm posting a duplicate of my tutorials here on DA to increase visibility and potentially help more people learn. Let me know if you have any questions or concerns. Thanks!
If you missed the first few tutorials, you can find them in my Journal. Here's the first one.
Knowledge Check
This tutorial is written with the expectation that you have already read through most of the basics tutorials on my site. If you haven’t already done so, please do so now to avoid confusion. Just click on my posts. ![]()
What is a transform chain?
A transform chain is a series of transforms that get executed in top down order instead of the normal way. I’m going to give some background here so everyone can be on the same page.
Normal Transform Behavior
A normal iterator has pre and post transforms as well as the normal transform nodes. The normal behavior is to have your transform nodes and the transforms will kind of bounce around between all the iterators based on the weights. This isn’t exactly what happens, but it’s the mental image that I choose to assign to how this process happens. It will start with iterator 1 and the weight says how likely it is to bounce to the next iterator and so forth and so on. You can use weights to control how the iterators interact, and even choose for two iterators not to interact with each other. That however is another tutorial. The scope of this one is to teach how pre and post transforms behave and how to use this to your advantage.
Pre and Post Transform Behavior.
Pre and Post Transform nodes only effect the current iterator and not the rest of the world. A Pre Transform will act on the iterator before it moves on and a Post Transform will act on it after it moves on. To understand this, you need to understand the flow. Lets say you have two iterators. The first one will bounce to the second and then back over and over as long as they have normal weights. If you apply a pre transform to the first iterator, it will execute it’s change to the first iterator before anything else and then make the change from it’s transform node. The same applies to post transforms, but those will take place after the normal transform node is applied. This is a confusing subject and that’s ok. The rest of this tutorial will be designed to demonstrate how this can be used and how you can take advantage of it.
What we’re going to create
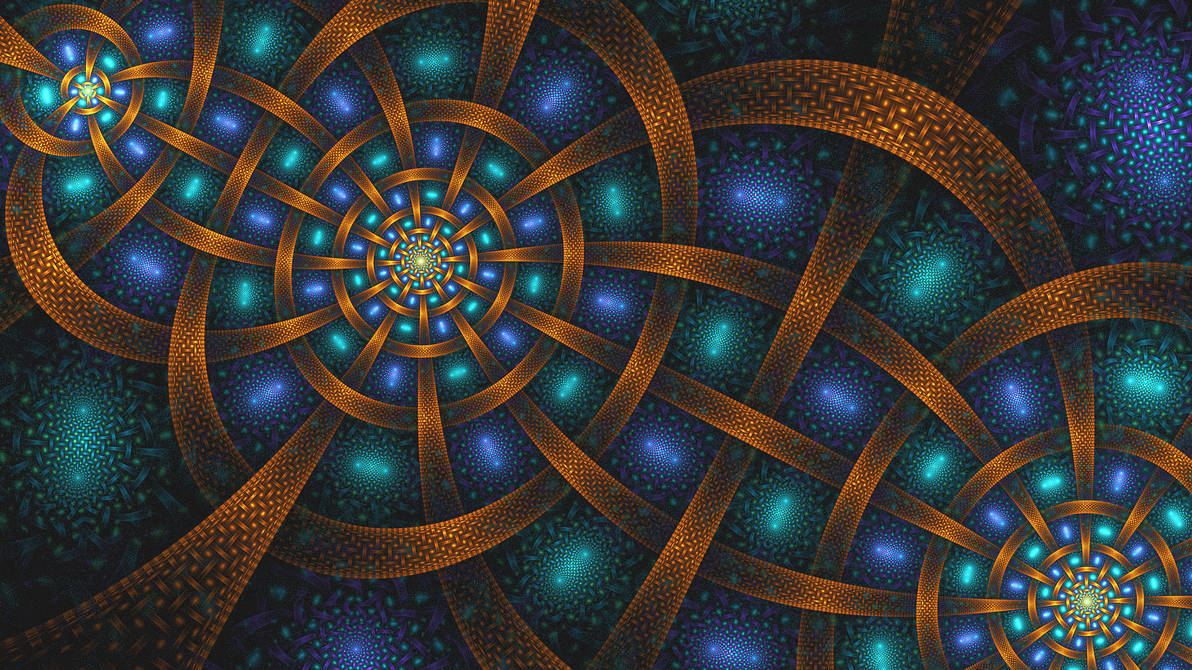
This tutorial will show you how to create this type of image.

Initial Setup
I’m going to start this tutorial in the normal way by opening up Chaotica and starting a new blank world. Then I’m going to go to the World Editor and create my first Iterator.
At this point a good idea is to state your goal and keep that in mind, however as always the creative process might just work the opposite way. Too often I find that I have no goal and one appears afterwards. I will say that using this method needs some type of goal as you have to have an idea of what you’re wanting the iterator to do beforehand.
I’m going to start by giving it a starblur and set the value to 0.5.


Now, let’s say we want the starblur to tile to the left and right. So, I’m going to enable the post transform on this iterator and add tile_hlp.

Next I’m going to add another post transform and add tile_log with all default values.

This will take a transform and make a tile both left and right of it. If you adjust the tile_log_spread value you can control how “bright” it is throughout the tile. In this example, I’ve raised that value so you can see it better. I’ve also zoomed out on the camera so you can see the full structure.
Next, for the sake of showing how it works, lets make that tile go up and down too.
Start by adding another post transform. This time mobius. mobius will allow us to tweak things. So now set Im_A to 1 and Im_D to -1. That will flip it 90 degrees without changing it’s size.

Next add two more. One tile_hlp and the next tile_log. Feel free to add them out of order to see what will happen. The entire benefit is that they are executed in a top down way.

What does this mean?
So, now we ask ourselves, what does this tell us? It tells us that we can take an iterator, and then change how it looks before we hand it off to the next iterator. This way we can precisely control how it looks before it interacts with other iterators.
If you think about it, this is incredibly powerful and can be used for a LOT of different things. Lets go back to the example and take away the last three transforms to get us back to the point where we had a single line of triangles.
Once you’re back to the single line create a new iterator and set the transform as linear.

Now go to the pre-affine for the new iterator and make it a bit smaller and rotate it a bit.


Now it’s starting to show the power of this method. Lets kick our game up a notch and create a glynnsim fill.
Glynnsim fill
Lets start with a blank slate and create the first iterator.
Set the transform to hex_rand and set it’s value to 0.5.
Next, setup a post transform. There are multiple ways to do this, but I’m going to show you one I like to use. We’re going to take the hex_rand and then fling it out into a single side with polar2, and follow that up with an infinite tile and then send the result to unpolar to bend it into a donut.
So Setup the first iterator like this:
Transform: hex_rand
value: 0.5
post_transform: polar2
post_transform: crop
crop_bottom: -0.35
crop_zero: 1
post_transform: tile_hlp
post_transform: tile_log
value: 0.104719755
tile_log_spread: 10
post_transform: unpolar
value: 6.0
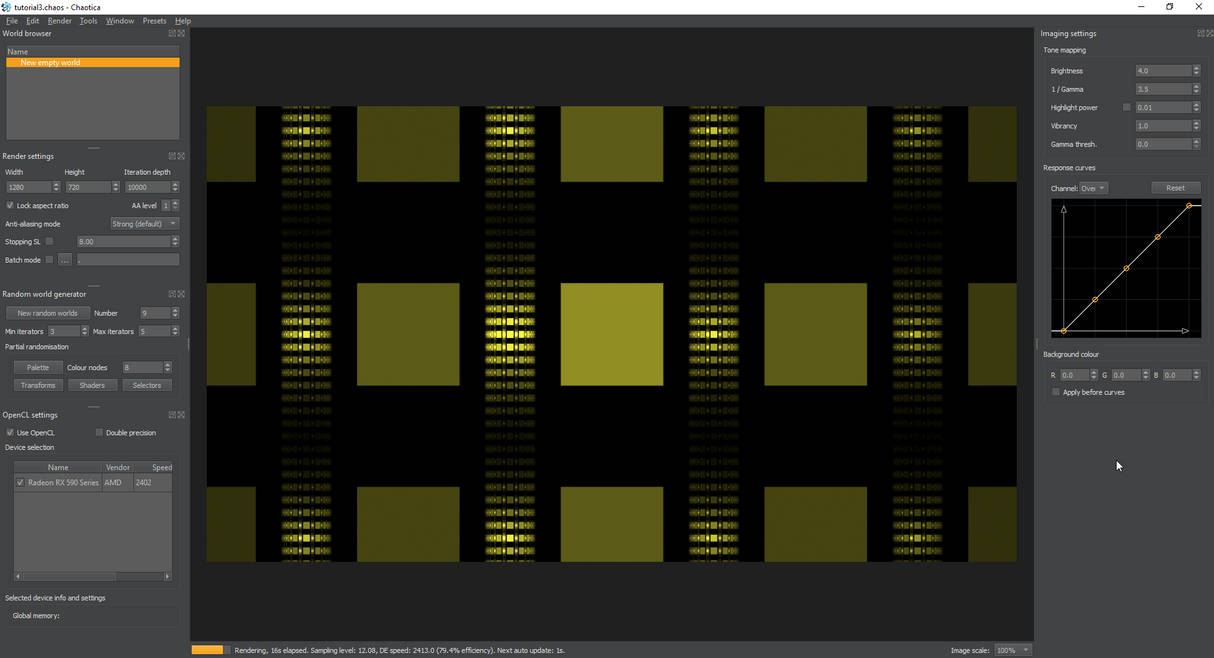
You end up with the following.

This method takes a hex rand, spreads it out with polar2, crops out the oddities, and then tiles it and then wraps it around into a donut. You may be wondering why the value on the tile_log. Well, anytime you work with foci or unpolar, you want the values to be pi/3 or a multiple of that. In this case it’s (pi/3)/10.
Next we’re going to put this into a glynnsim. So create a new iterator, and set it’s transform to glynnsim3. You can leave it all as the default for now.

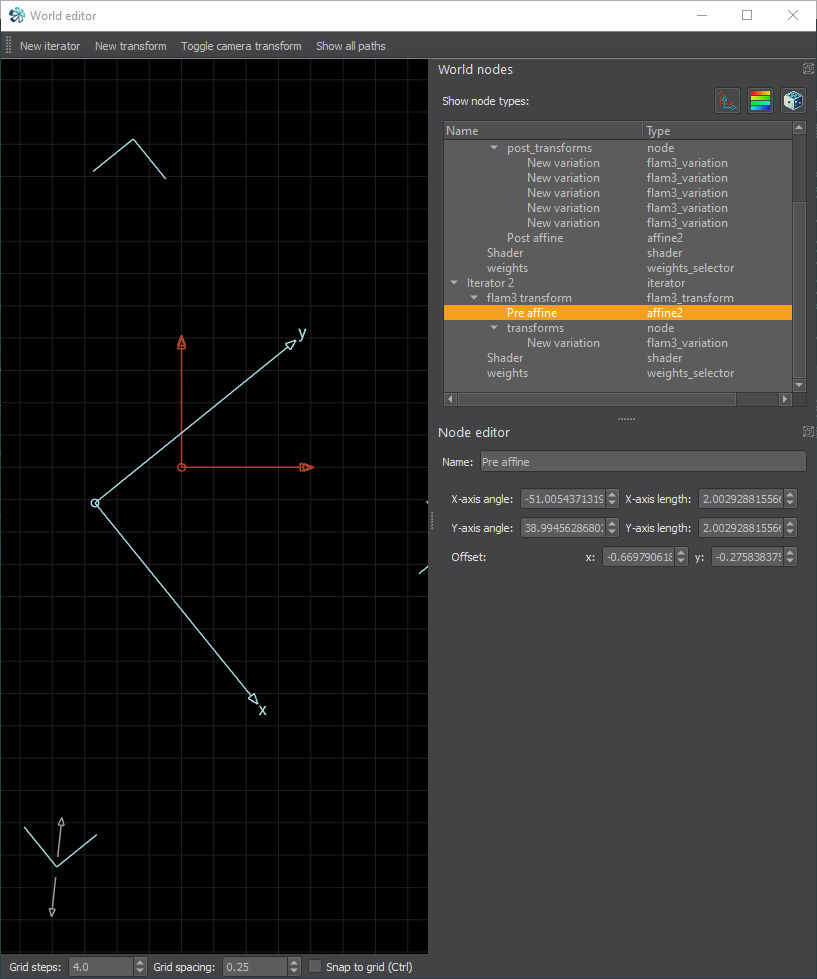
Now, add a post-affine to iterator 1 and adjust it to make the hex pattern fill as much of the glynnsim3 circle as possible without leaving the two white lines. If it does, you’ll know it. In my case, I just had to slightly make the post-affine bigger to fill more of the circle. Feel free to play with the values, or even get crazy and add in some circlecrop2. The idea is to fill as much or as little of the middle circle as possible. Glynnsim3 has three zones, the outside, middle and inside. Once you’re ready, the magic can begin. Go to the pre-affine for the glynnsim iterator and rotate and move it until you’re happy with the result. Mine is shown.

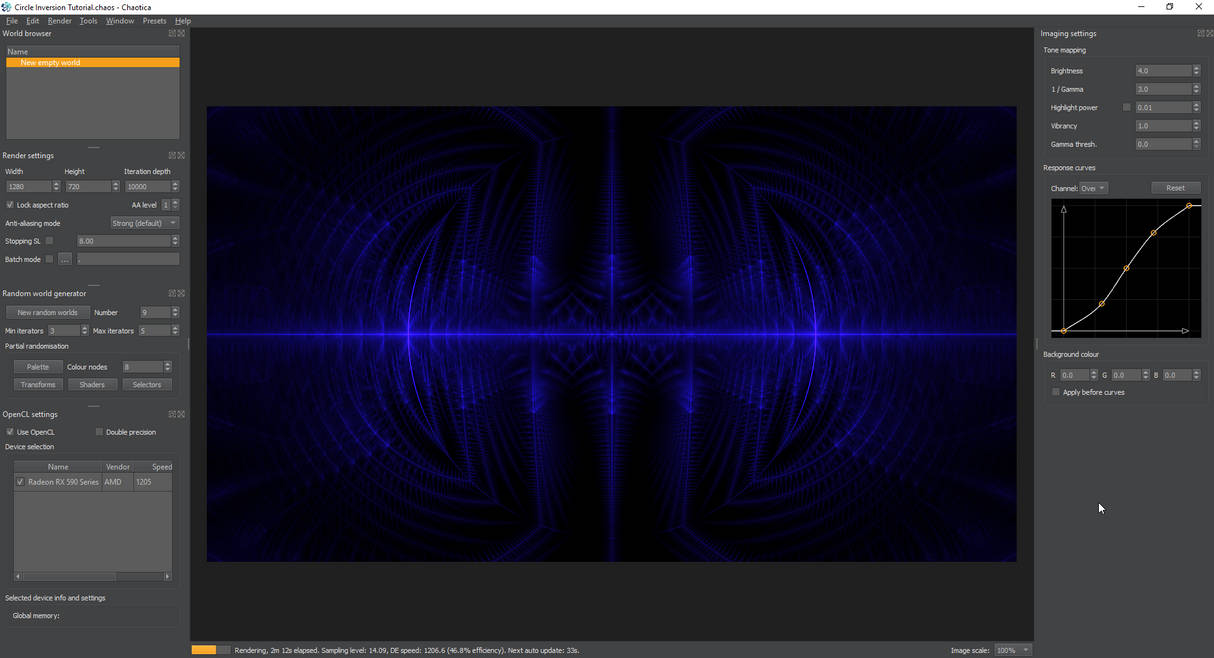
And as always, change the shaders, palette, and color curves until you’re happy. This is the final image.
What have we learned?
We have covered the ability to create basic pre and post transform chains, and how to use them in one instance of creating a fractal. It’s up to you to use this knowledge to make something awesome. Here are some examples of this being used.


Chaotica: Circle Inversions
Getting Started
On this tutorial, I’m going to demonstrate how to do a circle inversion on the camera transform. There are multiple ways to do this, and you don’t have to do it through a camera transform. This method on the other hand allows you to skip getting into weights, which is a whole other future tutorial.
Now that I’m done with the warnings, onward!
On this tutorial, I’m going to hope you’ve read the basics on Chaotica. I’m going to skip right into the meat of things and make this short and simple.
Initial Setup
First, lets make a simple pattern to use. I’m going to setup two iterators with the following information.
Iterator 1
Transform: julian2
Variables: all defaults
Post_Transforms:
Transform: tile_hlp
Variables: all defaults
Transform: tile_log
Variables: tile_log: 0.2 tile_log_spread: 10
This will create a simple julian and then tile it into infinity left and right.
Once you have it setup, go to the shader node and set the opacity to 0.
Iterator 2
Transform: hemisphere
Variables: all defaults
Next Steps
This will create a shape for us to play with in the camera transform. Here’s what mine looks like at the moment.

Now what we want to do is to crop this into a circle and then work with that. If you’ve been following my tutorials, you may be aware that I’ve mentioned transform chains. This uses a simple yet powerful method. In Chaotica, pre and post transforms can have any number of transforms. Unlike the normal behavior, they are executed in a top down way instead of mixing according to Chaos. This allows us to take the result of a transform or series of transforms and interact with it in a specific way to get a specific result. For lack of a better term, it’s a way to mix Chaos and Planning.
Camera Transform
Next I’m going to toggle the camera transform to on. I’m going to leave the basic transform as linear and then show the pre transforms.
I’m now going to create the pre transforms in this specific order.
Transform: circlecrop
Variables: circlecrop: 1 circlecrop_radius: 0.5
Transform: Spherical
Variables: spherical: 0.5
Transform: spher
Variables: spher: 1
What this does is crops the image into a circle, then the spherical inverts it inside out, and then the spher creates a copy of the outside on the inside of the circle. You can adjust the value of the spherical transform to put a gap between the two parts, or even throw in some mobius or anything else in the chain to vary the effect.
This is after applying the camera transform.
Don’t forget to apply some pallete and shader tweaks. You’ll be creating awesome in no time.

Notes on my art
Here's a few questions I've been asked recently. Here are my answers.
Can I use this image as a wallpaper or background?
Yes, you can, as long as you don't change it and it's for your personal use.
Can I use you work as a basis to build one of my own?
No. The license on it restricts it, and I spend a lot of time and energy on it and would like it to stay original.
My images are not stock images and they are not provided free for that purpose.
Can I share your work?
Sure, as long as it's in a link form. You cannot copy the image to another site without express written permission from me.
Do your images have a license?
Yes, they are licensed under Creative Commons Attribution-NonCommercial-No Derivative Works 3.0. (https://www.deviantart.com/users/outgoing?http://creativecommons.org/licenses/by-nc-nd/3.0/)
Can I see your parameters to see how you did something?
Sure, just ask, and I have a tutorial for a lot of it. I would appreciate seeing what you do with it too so I can shower favorites on you. :D
Chaotica: Transform Examples
Author's Note: I'm posting a duplicate of my tutorials here on DA to increase visibility and potentially help more people learn. Let me know if you have any questions or concerns. Thanks!
If you missed the first few tutorials, you can find them in my Journal. Here's the first one.
What do the transforms do?
When I first started working with fractals, I didn’t start from a math perspective. I started from a “oh this is cool software” perspective. The biggest question I had was, what do these transforms do and how do I make use of that? This is a common question. I hang around in the fractal chat discord and I’m active on DeviantArt and I answer questions in both places. The most asked question is, how the heck do I see what transforms actually do? In this tutorial, I’m not going to go through every transform and tell you what it does. That would defeat the purpose of learning. I’m instead going to teach you how to build a Chaotica world that you can use as a testing grounds. This method was originally created by tatasz on DeviantArt and she mentioned it in one of her journals. I’ve expanded on it and now I’m releasing the updated method tailored to Chaotica.
Credits
The original idea came from tatasz, and I bounced part of this off Crystalize. A big thanks also goes out to the community as a whole. Thanks guys!
If I have seen further than others, it is by standing upon the shoulders of giants. - Isaac Newton
Building the Basics
Ok, to start off with, we’re going to create a single iterator that creates an infinite chessboard plane. This method can also be used to create infinite tiles if you’re paying attention. If you’re read the rest of the tutorials you’ll see some methods here that build on what you’ve already learned, but this tutorial is written in a way to make the rest of them not really required. If you don’t understand why something works the way it does, or you have any questions, please contact me and let me know so I can clarify that part of the tutorial.
Iterator 1
Create an iterator and add a transform. Set this transform to square with all the default values.

Next, create a post-transform and pick polynomial for the transform. Set the polynomial_lcx and polynomial_lcy to -0.5. This will shrink the square by half. Next change the polynomial_scx and polynomial_scy to -0.25. This will move the square back to the top left corner of where the original square was. Now, we could have done this a different way, but this gives me the opportunity to illustrate a new way of doing things. The idea is to create a tile. This tile will have a unit size of 1. The original square has a unit size of 1. When we tile anything, it’s vastly easier to tile it, if it stays to a 1 unit size.


Now we’re going to create a second square in the opposite corner. Create a new post-transform and set it to mirror_x. This will mirror the X axis across the y axis.

Next create a new post-transform and set it to flipy. This will flip everything top to bottom and uses the Y axis as it’s center line.


Next, create yet another post-transform and set it to tile_hlp. This will set it up to create a very nice tile both left and right. The transform tile_hlp is a helper transform and is designed to be used with the next one we’re going to add.


Next create another post-transform and set it to tile_log. This transform will tile the target both left and right and you can use the tile_log_spread to control how much it spreads out.


Now comes the fun part. We’re going to create another post-transform, but this time set it to mobius. Mobius is like a linear, but we can do a lot of nifty things with it. it’s extremely useful, but in this specific case, we’re going to use it to rotate the entire tile 90 degrees. Set the Im_A to 1. This will make it larger, and rotate it 45 degrees. Next set the Im_D to -1.0. This will lower the size back to normal, and finish the rotation to a full 90.


Next, create two more post-transforms. Can you guess what they will be? We’re creating a checkerboard, so we have to tile it the rest of the way. It will be a tile_hlp and then a tile_log. This will complete the checkerboard pattern.


Checkerboard Complete!
Ok, now we know how to create a checkerboard pattern with a single iterator. The techniques illustrated here may be useful later in many things. Where does that take us though? You’ll find out, we’re almost done. I promise!
Camera Transform.
Next, turn on the camera transform. It will default to linear. Start by picking any transform. This setup is ideal for seeing how transforms behave and testing variables. Try bipolar. All you have to do to see what something does is change the camera transform and the image will shift to show you. Simple right? Play, learn and have fun!


Stay tuned for the next one. I'll post a link here when I get it loaded into DA, or feel free to check out all my tutorials on my blog.
Chaotica: Linear Latitude
Author's Note: I'm posting a duplicate of my tutorials here on DA to increase visibility and potentially help more people learn. Let me know if you have any questions or concerns. Thanks!
If you missed the first couple tutorials, you can find them here.
Introduction
In the previous tutorials you’ve learned how to use the basics of Chaotica. In this tutorial, I’m going to show you how to create a basic linear tile.
Creating the Thing to Tile
Start off with creating a new empty world.

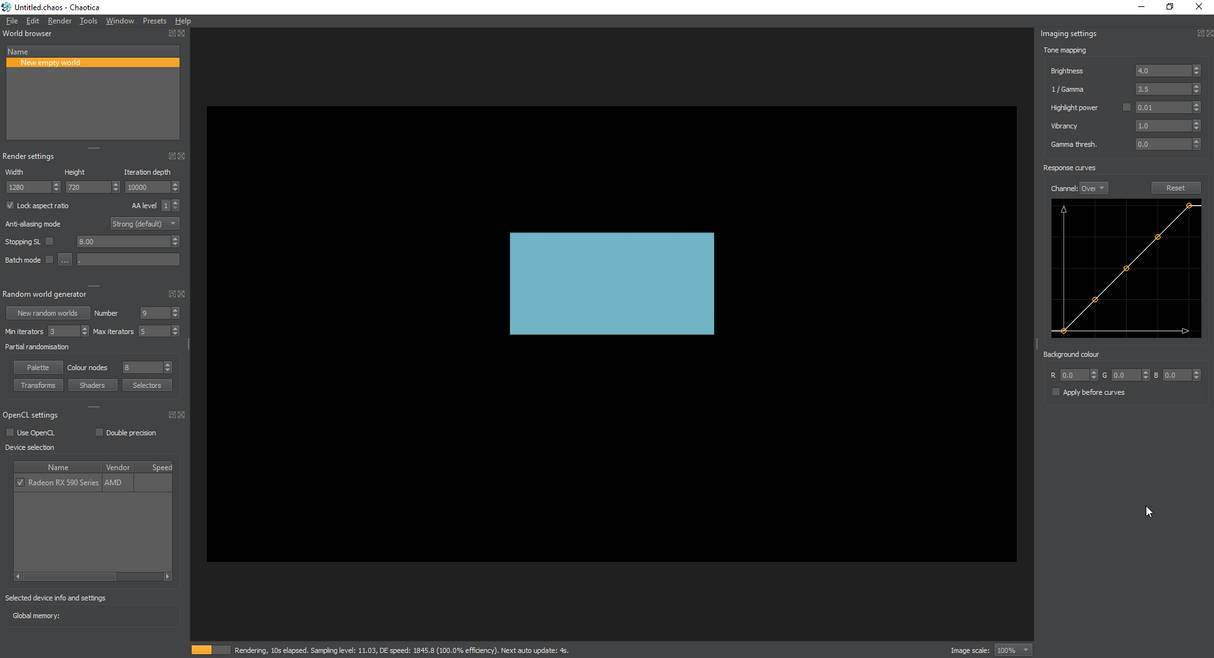
Next, open up your world editor. A linear tile starts with a linear transforms. It doesn’t really matter which order you put them in, but for the sake of the tutorial, I’ll start with a square so you can see what happens as we go along.
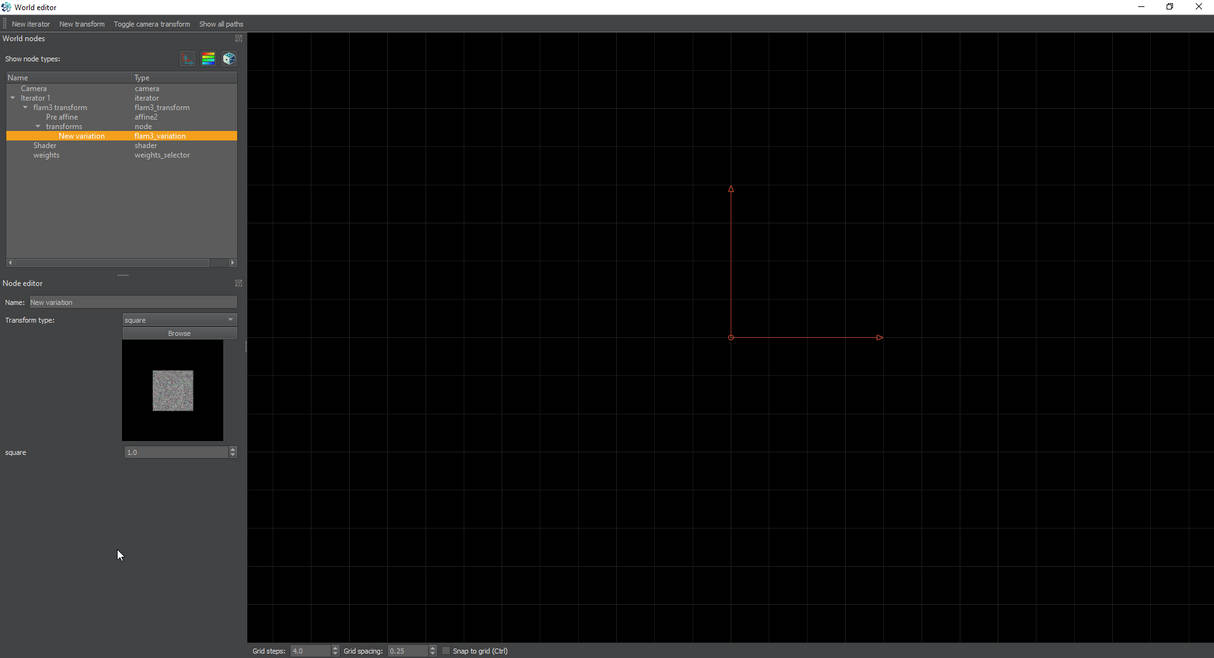
Go ahead and create a new iterator, and then open up it’s transform node and create a new transform. Make this a square transform and set the value on it to 0.5
This is what the main window will look like now.

Setting up a tiled plane
Now we’re going to setup a basic linear tile. A linear transform “moves” the whole in a direction from the origin. That’s not exactly what happens but it’s a simple enough explanation to get an idea of how it interacts. I’m going to create another iterator and add a linear transform to it. Then I’m going to go to the pre-affine and offset it by 1.0 in the x axis.
This is the editor window now, and the main window so you can see the change.


As you can see the initial square is now copied to the right. I’m going to create another linear iterator, and copy it up by 1, or 1.0 offset in the y axis.
Note: in the current version of Chaotica 2, a 1.0 offset actually moves it down instead of up. The values are inverted.


Now the whole thing has been tiled both right and down. You could add another two linears in the other two cardinal directions, but because of the way it works, you only need one more really. I’m adding yet another linear iterator and this time offsetting the x-axis by -1.0 and the y-axis by -1.0 This tiles the rest of the iterators in all directions.
Now, we have a nice field of squares. Yay! this is a basic linear tile. However, I’m sure you came to this tutorial for more than just that. Lets make it look a lot more fun.


For the sake of simplicity, I’m going to go ahead and move the third linear iterator back up one, and create a fourth for the other cardinal direction.


Weights
Now, notice how the center is bright and the rest are dark. That’s normal and can be adjusted a bit using weights. You can raise the base weight of the linear iterators to increase the brightness. However, there’s a lot of empty space in there. Lets add some cylinders.
Before you start though, I’m going to recommend you go back through and name your iterators so you know which one is which. It’s a habit I’m still trying to get into and will save you time later on when you’re hunting for something. Next, make sure you remember to save. I find it’s a huge time saver to create a series of basic tiles and transforms that I can go back to later and tweak from that point.
Filling in the blank spots
To start off with, I’m going to create a cylinder2 transform in a new iterator. I’ll set the value to 0.25.


Now, notice how the cylinder overlaps with the squares. We’re going to fix that. First, I’m going to change the x and y axes in the pre-affine to 0.5 instead of 1.0 length. Then I’m going to add a post-affine and do the same thing. Then I’ll offset the post-affine -0.5 on the x axis so that it falls into the space between the squares. I find that doing this gives a better look to the cylinders.

Next, I’m going to offset the post-affine for this cylinder in the y axis by 0.5 This moves the bright spot to a diagonal away from the square.


That’s looking better. Now we need a horizontal cylinder. Notice though that the cylinder is made up of smaller copies of the entire image. It’s so freaking cool to me. As you build this structure, notice how the cylinders change to reflect the overall image as a whole.
Next I’m going to create a new cylinder the exact same way with the value set to 0.25 like before. This time however, I’m going to rotate it 90 degrees on the post-affine and offset the y-axis on the post-affine by 0.5.


Finishing up
This gives a bit of a crosshatch look, which I tend to enjoy. At this point, I suggest saving the world so you can come back here later on. Now, from here there’s several things we can do. The most obvious is changing out the square for something else. I suggest playing with it. There are many options available. You can also play with the base weights of the linear transforms to get a brighter pattern. Finally, you could play with the camera transform. Unpolar, tanh, and foci work well with a linear tile though foci and unpolar take a bit of tweaking to make it work.
I’ll leave you with a final image with a random shader applied and a random pallete applied.

Hint: For foci or unpolar resizing the affine by variations of pi/3 tend to work wonders.
Examples
At this point though, where you take the fractal is up to you. I’ll leave you with a few examples of what I have created with this method.


Here's the next tutorial! Hope you enjoy!